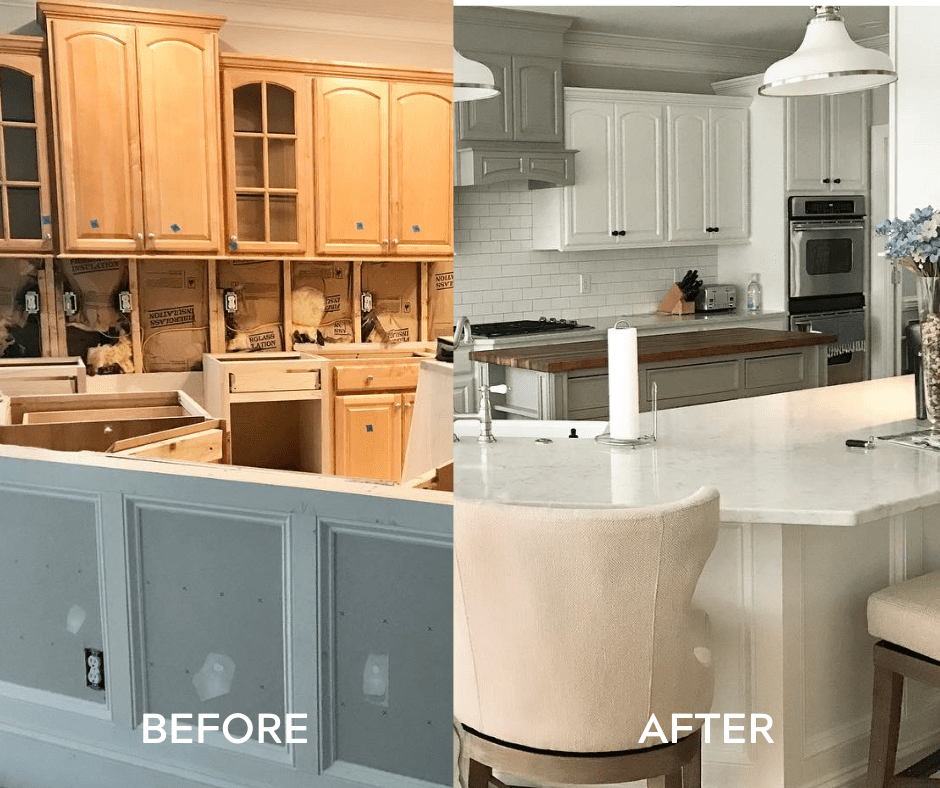
Are you breathe a fresh vibe into your kitchen without the expense of a total redesign? Refinishing kitchen cabinets might just be the perfect solution for you. This approach not just elevates the aesthetics of your area and also increases the functionality and price of your home. With a little bit of patience and the proper strategies, even novice newcomers can realize stunning results and transform their outdated cabinets into stylish highlights of their cooking areas.
Refinishing your cabinets in the kitchen is an excellent way to reveal the potential of your space. It gives you to customize the look to suit your taste while saving money and reducing excess. Regardless of whether you're motivated by a wish for a fresh look or a necessity to enhance the durability of your cabinets, understanding the steps involved in kitchen cabinet refinishing can turn the process satisfying and rewarding. Let's delve into the approach and tips that will support you kick off on this pleasurable DIY project.
Crucial Equipment and Supplies
To secure a successful kitchen cabinet refinishing project, having the appropriate tools and materials is essential. Begin with simple tools like a screwdriver for removing cabinet doors and hardware. A paint scraper will assist remove old paint or finish, while sandpaper or a sanding block will prepare the surface for a new coat. A set of brushes and rollers will be key for applying primer and paint consistently. Additionally, a drop cloth will protect your floors and surfaces from dust and spills, creating a clean workspace.
In addition tools, selecting top-notch materials is equally important. Start with a reliable primer designed for wood surfaces to ensure proper adhesion of paint. For the finish, select a long-lasting paint or stain that suits your aesthetic look. Oil-based paints are known for their durability, while water-based options offer easier cleanup and minimized fumes. Don’t forget to invest in a clear coat for added protection, especially in frequently used kitchen environments.
Protection should also be a priority during the refinishing process. Make sure you have safety goggles and a mask to protect against dust and fumes. Gloves will shield your hands from chemicals and paint. Proper ventilation in your workspace is also essential to ensure that you are working in a safe environment. By gathering these tools and materials before initiating your project, you can pave the way for a seamless and satisfying kitchen cabinet refinishing journey.
Step-by-Step Restoration Procedure
The initial phase in kitchen cabinet refinishing is to detach all cabinet faces and hardware. This includes handles, pulls, and hinges. Make sure to keep all the screws and minor components organized, so you won’t have issues during the reassembly process. Once everything is detached, clean the areas carefully to remove dust, grease, and grime. A mixture of lukewarm water and a mild detergent will be effective for this. It is important to have a clean area for proper adhesion of the new coating.
Next, smooth the cabinet surfaces to create a level base for refinishing. Use a soft sandpaper to carefully sand all sections, focusing on any imperfections or old coatings that may require removal. After sanding, it is important to clean the areas with a damp cloth to remove any sanding dust. If needed, you can also use a base coat designed for cabinetry. This will help to ensure that the new paint or stain adheres properly and provides an uniform finish.
Once the areas are prepard, you can begin to apply the new finish. If you are using paint, choose a high-quality cabinet paint that is durable and can resist daily wear. For staining, select a stain that complements your kitchen’s overall aesthetic. Apply the finish using a brush or a spray gun, depending on your choice. It is recommended to apply multiple thin coats, allowing each coat to dry completely before adding the following one. This will help produce a refined result that enhances the beauty of your kitchen cabinets.
Tips for an Professional Finish
To attain the polished outcome when revamping your kitchen cabinets, preparation is crucial. Start by removing all cabinet doors and hardware, and make sure that your workspace is clean and free from dust. Use your quality degreaser to clean the surfaces thoroughly, as oil and grime can prevent paint or stain from adhering well. Sand the surfaces lightly with fine-grit sandpaper to create an refined base for your finish. This step not only prepares the wood but also helps to remove any old finish and improves the adhesion of your new coat.
When it comes to putting on your chosen finish, consider using a high-quality brush or a sprayer for even coverage. diamondsprayfinish.com can also be beneficial for larger areas, but be sure to use the right foam or nap for flat surfaces. Apply thin, even coats rather than one single thick layer to prevent drips and ensure a smooth appearance. Allow each coat to set completely before applying the next; this will help to achieve a long-lasting finish. Additionally, if you are using paint, consider adding an coat of primer first, especially when moving from one darker to a lighter color.
Finally, don't overlook the importance of sealing your revamped cabinets. Once the paint or stain has dried completely, apply a clear protective topcoat to guard against scratches and wear. Choose either a water-based polyurethane for easy cleanup and a low odor, or either an oil-based option for a more durable finish. Remember to follow the manufacturer's instructions for use and drying times. With careful preparation, attention to craftsmanship, and the right products, your kitchen cabinet refinishing project can yield stunning results that add worth and beauty to your home.